WALT explore different printmaking conventions.
In class, we have been doing some printmaking and how this work is that,
Step 1: First we had to sketch the flower we are going to print and we had to make about four sketches and pick one between the four sketches we made. After we receive another piece of paper and a cardboard paper that is shaped like a square with even sides. Next we had to trace the cardboard paper onto the piece of paper to put the flower we chose between the four sketches. Then lastly, draw the flower we choose on the piece of paper that is now shaped as a square.
After all the sketching and the shaping, we were given a thick piece of paper and using the paper with our flower on it, we had to trace but not tracing the whole thing, we had to put layers and glue them on the piece of cardboard we had earlier,
like this:

As you would be able to see I have taken a photo of it with ink on it but you can kind of see a tiny bit of layers and some of it has come off.
Step 2: Secondly, we were able to put some ink on it and place it on a paper but the first time we had to do it was when we had to practice only so we could get used to printmaking.
Here is my practice printmaking:

There were only black and red colours we could use and it was very sticky.
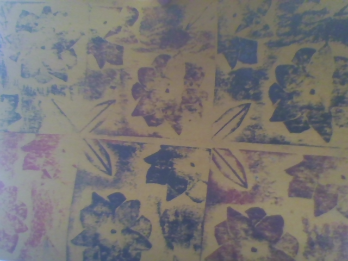
Step 3: Lastly, we were given another piece of paper but more bigger and then print the piece of cardboard paper with our layers on it.
This was our last print:
It was kind of hard the first time, but it kind of got more fun to do.
Try doing printmaking at home or school.